somewhere to talk about random ideas and projects like everyone else

stuff

#canvas

Generating the iOS 5 Linen texture with Canvas 19 August 2011

noise
I guess the linen texture which is way too prevalent in Lion and iOS 5 looked pretty cool so I tried replicating the effect in canvas. It’s not instant but the texture is generated fairly quickly. It’s all done in around 20 lines of code. The basic idea is to first create a bunch of semi-transparent noise such as the stuff on the right (Though in the real one the opacity is only 3% and in the one on the right it’s been increased to 70%). To do that, we createImageData and set every fourth pixel to 6 if Math.random() < 0.1. That means approximately 10% of the canvas will be semi-transparent with the rest being totally transparent. I’m not clever enough to embed some steganographic message in the ostensible noise pattern, because I’m just way too lazy for that sort of stuff. But if you think that that last sentence was actually a decoy for my master plan, feel free to waste time decoding a message which probably isn’t there.

After that, the canvas is converted to a DataURL so it can be loaded as an image. After loading the image, we iterate 40 times and call drawImage on the original canvas with an offset to make every single point into a cross-shape. Demo.


Weppy Updates Opera, Chrome and Firefox support and simpler usage 09 October 2010

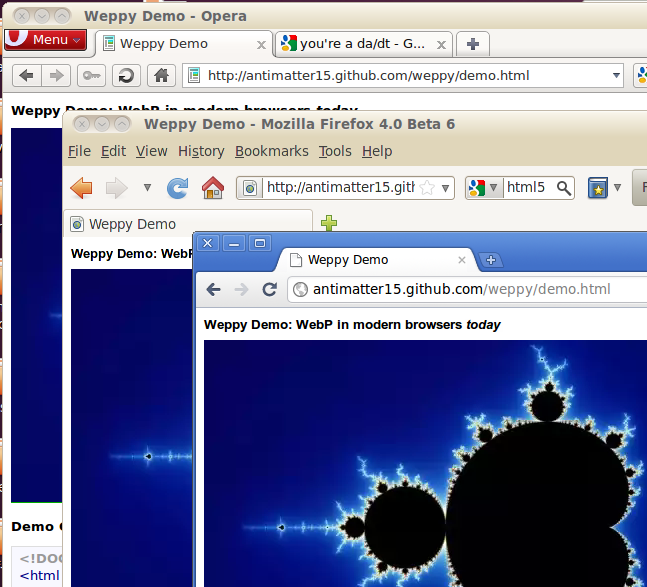
With help from @Frenzie and @paul_irish, the latest not-yet-versioned release of Weppy, my Javascript WebP to WebM conversion library, or something of a polyfill for a format that is yet to be part of any specification (HTML5 seems to specifically reference the image src attribute are examples such as PNG, GIF, JPEG, APNG, PDF, XML, SVG, SMIL, and MNG). The new release brings some awesome new features that really don’t change much and shouldn’t really be used in the real world because most browsers in the world still aren’t Firefox, Chrome or Opera - that is, a large portion of the browser market includes browsers like Safari and IE, either suffering from antiquity (IE6! aah!) or just liking h264 (IE9 + Safari).

The new release supports Opera. I never bothered debugging Opera, I figured it was another huge issue that would demand a rewrite (as supporting Firefox had needed, because the order of the object keys isn’t preserved and breaks the EBML result, or at least for Firefox’s parser which seems to be somewhat stricter than Chrome’s, is that ffmpeg?). And after premature optimization (stripping “unnecessary” EBML tags), my code didn’t work in chrome, so I had to revert to an earlier revision. All my testing code was based on file drag-drop stuff, and Opera doesn’t support that. Until I saw this mozillazine topic, I didn’t care, but it was a lot easier to fix than I feared.

Part of the solution was getting rid of the canvas stage. Admittedly, the canvas stage was pretty useless once the toDataURL() stage was removed before the first public release, but I didn’t feel like deleting code, so it stayed there. Also, I noticed that the global variable that gets introduced was accidentally named “WebM”, which is wrong, it should be “WebP”, but because of the uncreative format naming and similarities, I didn’t notice. Not sure, but it seems to be more stable now.

Chrome probably will add WebP soon, and it needs to be future proof, detecting whether or not a browser supports the WebP format. To do that, it creates an Image, sets the src to a data url of a 4x4 webp image and listens to the onload and onerror events, checking if the size is correct and there were no errors loading it. The routine is expected to error and totally untested as there aren’t any browsers that support the feature yet for me to try.

Another change, is that by default, it will automatically load all the same-origin (because of the limitations of XHR) webp images (from <img> tags), on the DOMContentLoaded event, so the library is practically drop-in now. In any web page, you can pretty much add <script src=”http://antimatter15.github.com/weppy/weppy.js“></script> and on the supported browsers, it should automatically load and replace all WebP images, though not something I would really recommended.

The demo is the same place it always was: http://antimatter15.github.com/weppy/demo.html

There is also this nifty hack that uses <canvas> to add an alpha channel to the WebP image (adapted from the original JPEG one): http://antimatter15.github.com/weppy/alpha/alpha.html

Also, please follow me on twitter.


3D Sculpting Tool 08 September 2010

So for the past few days, I discovered this neat app called Sculptris. It’s this amazing digital sculpting app where your canvas is basically a blob of virtual clay that can be molded into any shape with any level of detail. It’s windows-only, and I thought it would be neat to have something like it that works in the browser. First I thought of using WebGL, but trying to start chromium with webgl always ends up with a GLXFBConfig error, and on Firefox, it’s stuck with using libosmesa which gives absolutely terrible framerates (IDK why but Fx4 crawls on my computer. Panorama is so slow it lags from simple dragging). Eventually, I ended up basing it off my js1k function plotter, because it’s a fairly simple 3d renderer.

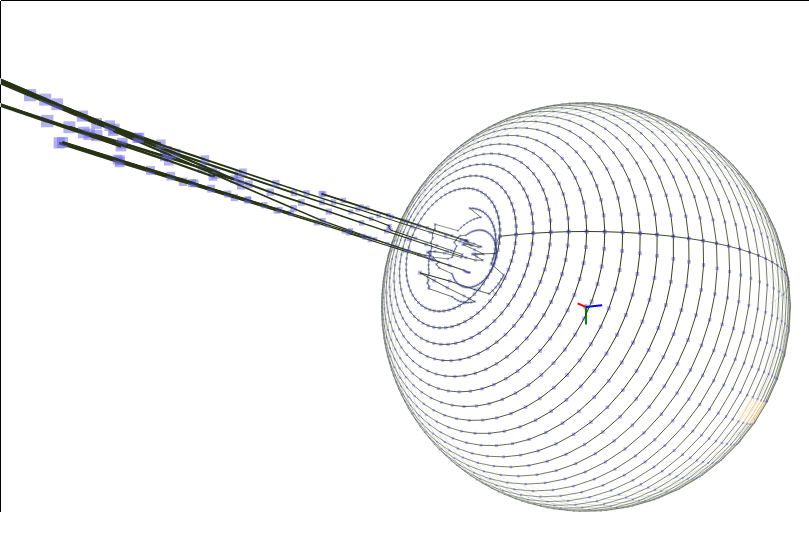
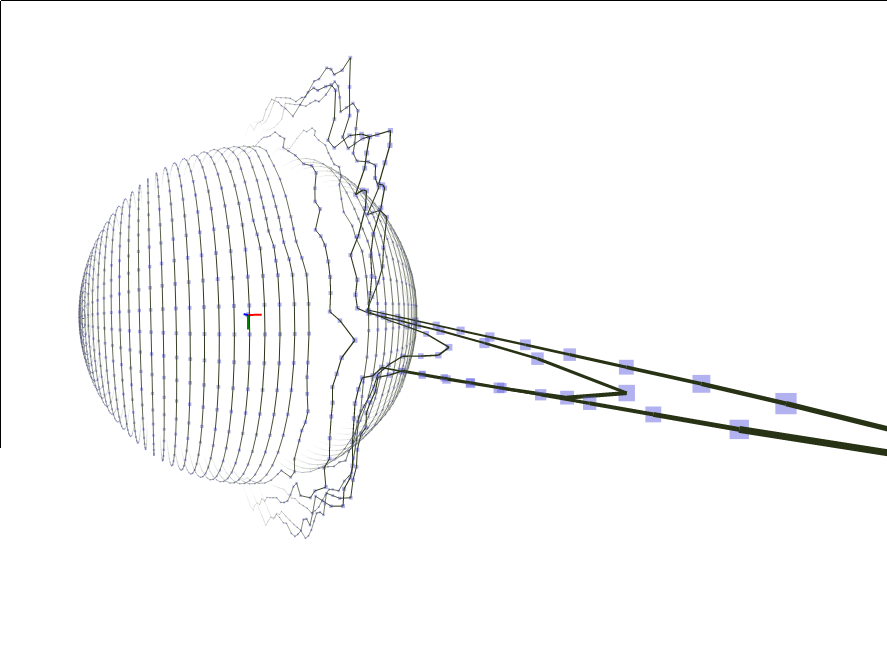
The pictures on the top of the page are of the death star and alderaan, respectively, mostly because planets (and moons that aren’t moons) are mostly spherical and explosions and light rays are pretty much the only things that this app is suitable for at these stages.

So how does it work? It’s actually really simple, and probably too simple. At ~300 LOC of pretty trivial JS, it’s not much at all (though it is hideous, I must warn you). It is based on my js1k entry, and I considered making this a 1k submission, but I gave up and said I couldn’t. It starts off simple enough, do lots of freaky trigonometric loops to generate a set of points that lie on a sphere. Then loop through every 50 milliseconds, apply a 3d transformation, get points that lie within a radius of the mouse position and reference them in the selected array. Then you segregate the selected array into the foreground and background, find the arithmetic mean of the fg and bg, respectively and find the difference. Then I convert it to spherical coordinates and get rid of the ratio to ignore the magnitude of the vector and add it to the position of foreground points. Then loop through all the points and wherever there’s a long distance, insert a new dot at the midpoint.

For no apparent reason I decided not to put many words on it. I was actually reluctant to add “points” and “undo”, but it’s fine print in faded color that doesn’t help the user at all.

  • Middle Click + Drag to rotate (in 3d)
  • Right Drag to deflate the shape
  • Left Drag to inflate the shape
  • Middle Scroll to zoom in/out
  • The slider bar is for controlling the size of the selection.
  • The checkbox enables/disables Undo/Redo (via CtrlZ/CtrlY or CtrlZ/Ctrl+Shift+Z). App: http://antimatter15.github.com/3d-sculpt/3d.html

Mirrored Version: http://antimatter15.github.com/3d-sculpt/mirror.html

(Not as in the other meaning for mirror, but it actually reflects the X axis so that it’s symmetrical, which is a neat feature in sculptris)

Github: http://github.com/antimatter15/3d-sculpt


gravity 10 June 2010

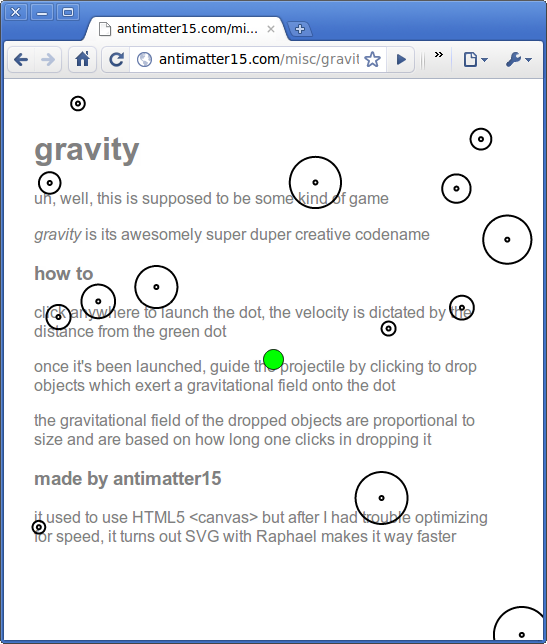
Here’s my foray into the flash-esque html5 game arena. It’s a simple game built initially in <canvas> but later scrapped for Raphael because I guess it’s something more suitable for svg than canvas. The interface is fairly simple, you click to start the game, where your projectile is sent off at the velocity relative to green blob in the center. Once it’s launched, the projectile is affected by the gravitational field of all the planets in some fairly pretty near-orbits. Once the projectile is in motion, clicking drops a new planet at where your cursor is, holding down makes the planet grow. The objective is to have the projectile not accelerate off the screen.

As per Kepler’s laws, getting near a planet produces the “gravitational slingshot” effect. Since the projectile tends to fly toward the center of planets, a magical divide-by-zero causes the infinite acceleration toward doom.

As with several other of my recent projects, it supports various configuration options via the url query string. If you don’t know how it works, basically, you append ?opt1=val1&opt2… to the url. Example: gravity2.html?grav=4 , simply gravity2.html?fastest or a combo of gravity2.html?fastest&grav=4&random. The current options are fastest to prevent the targeting of 80fps (accepts no args), target the target fps (obviously can not be used with fastest, in the case, fastest takes precedence) and it accepts one numerical argument, the default is 80. grav accepts one numerical argument, the default is 4 and is the attraction of the planets (zero isn’t very fun). _random _makes the planets start off in random places rather than the predefined magical positioning.

Feel free to post highscores in the comments.


Pure JavaScript HTML5 <canvas> to (Animated) GIF Conversion 03 January 2010

Based on as3gif Ported by antimatter15

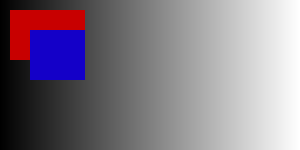
This is the raw canvas element saved as a non-animated PNG
This is the GIF which was generated from the canvas.

AS3GIF lets you play and encode animated GIF’s with ActionScript 3

Since web pages can usually natively play GIFs fine, it’s only a port of the GIFEncoder portions of the library.

Basic Usage

Since it pretty much is GIFEncoder, you could consult the as3gif how-to page

But there are some differences so I’ll cover it here anyway.

You first need to include the JS files. It’s probably best if you include it in this order, but it shouldn’t matter too much.

<script type="text/javascript" src="LZWEncoder.js"></script>
<script type="text/javascript" src="NeuQuant.js"></script>
<script type="text/javascript" src="GIFEncoder.js"></script>

If you want to render the gif through an inline <img> tag or try to save to disk or send to server or anything that requires conversion into a non-binary string form, you should probably include b64.js too.

<script type="text/javascript" src="b64.js"></script>

Simple enough right? Now to convert stuff to GIF, you need to have a working <canvas> or at least some imageData-esque array.

<canvas id="bitmap"></canvas>
<script>
  var canvas = document.getElementById('bitmap');
  var context = canvas.getContext('2d');
  context.fillStyle = 'rgb(255,255,255)';
  context.fillRect(0,0,canvas.width, canvas.height); //GIF can't do transparent so do white

  context.fillStyle = "rgb(200,0,0)";  
  context.fillRect (10, 10, 75, 50);   //draw a little red box

Now we need to init the GIFEncoder.

  var encoder = new GIFEncoder();

If you are making an animated gif, you need to add the following

  encoder.setRepeat(0); //0  -> loop forever
                        //1+ -> loop n times then stop
  encoder.setDelay(500); //go to next frame every n milliseconds

Now, you need to tell the magical thing that you’re gonna start inserting frames (even if it’s only one).

  encoder.start();

And for the part that took the longest to port: adding a real frame.

  encoder.addFrame(context);

In the GIFEncoder version, it accepts a Bitmap. Well, that doesn’t exist in Javascript (natively, anyway) so instead, I use what I feel is a decent analogue: the canvas context. However, if you’re in a situation where you don’t have a real <canvas> element. That’s okay. You can set the second parameter to true and pass a imageData.data-esque array as your first argument. So in other words, you can do encoder.addFrame(fake_imageData, true) as an alternative. However, you must do an encoder.setSize(width, height); before you do any of the addFrames if you pass a imageData.data-like array. If you pass a canvas context, then that’s all okay, because it will automagically do a setSize with the canvas width/height stuff.

Now the last part is to finalize the animation and get it for display.

  encoder.finish();
  var binary_gif = encoder.stream().getData() //notice this is different from the as3gif package!
  var data_url = 'data:image/gif;base64,'+encode64(binary_gif);

Docs

Each of the files exposes a single global (see, at least it’s considerate!). But since there’s three files, that means that there’s three globals. But two of them are more of supporting libraries that I don’t totally understand or care about enough to document. So I’m just gonna document GIFEncoder.

new GIFEncoder() This is super parent function. You really don’t need the new keyword because It’s not really even using any special inheritance pattern. It’s a closure that does some var blah = exports.blah = function blah(){ for no good reason. Anyway, it returns an object with a bunch of methods that the section will be devoted to documenting. Note that I’ve never tested more than half of these, so good luck.

Boolean start() This writes the GIF Header and returns false if it fails.

Boolean addFrame(CanvasRenderingContext2D context) This is the magical magic behind everything. This adds a frame.

Boolean addFrame(CanvasPixelArray image, true) This is the magical magic behind everything. This adds a frame. This time you need you pass true as the second argument and then magic strikes and it loads your canvas pixel array (which can be a real array, I dont care and I think the program has learned from my constant apathy to also not care). But note that if you do, you must first manually call setSize which is happily defined just below this one.

void setSize(width, height) Sets the canvas size. It’s supposed to be private, but I’m exposing it anyway. Gets called automagically as the size of the first frame if you don’t do that crappy hacky imageData.data hack.

void setDelay(int milliseconds) the number of milliseconds to wait on each frame

void setDispose(int code) Sets the GIF frame disposal code for the last added frame and any subsequent frames. Default is 0 if no transparent color has been set, otherwise 2. I have no clue what this means so I just copypasted it from the actionscript docs.

void setFrameRate(Number fps) Sets frame rate in frames per second. Equivalent to setDelay(1000/fps). I think that’s stupid.

void setQuality(int quality) Sets quality of color quantization (conversion of images to the maximum 256 colors allowed by the GIF specification). Lower values (minimum = 1) produce better colors, but slow processing significantly. 10 is the default, and produces good color mapping at reasonable speeds. Values greater than 20 do not yield significant improvements in speed. BLAH BLAH BLAH. Whatever

void setRepeat(int iter) Sets the number of times the set of GIF frames should be played. Default is 1; 0 means play indefinitely. Must be invoked before the first image is added.

void setTransparent(Number color) Sets the transparent color for the last added frame and any subsequent frames. Since all colors are subject to modification in the quantization process, the color in the final palette for each frame closest to the given color becomes the transparent color for that frame. May be set to null to indicate no transparent color.

ByteArray finish() Adds final trailer to the GIF stream, if you don’t call the finish method the GIF stream will not be valid.

String stream() Yay the only function that returns a non void/boolean. It’s the magical stream function which should have been a getter which JS does support but I didnt’ feel like making it a getter because getters are so weird and inconsistent. Like sure there’s the nice pretty get thing but I think IE9/8 doesn’t implement it because it’s non standard or something and replaced it with a hideously ugly blah blah. So Anyway, it’s a function. It returns a byteArray with three writeByte functions that you wouldn’t care about and a getData() function which returns a binary string with the GIF. There’s also a .bin attribute which contains an array with the binary stuff that I don’t care about.

WebWorkers

The process isn’t really the fastest thing ever, so you should use WebWorkers for piecing together animations more than a few frames long.

I haven’t actually tried it yet, but here’s some incomplete mock-JS which should be able to do stuff once you add the boring stuff like serializing and deserializing the content (actually, i have most of the serializing done but you have to deserialize that and that’s really the boring part).

var frame_index,
    frame_length,
    height, 
    width,
    imageData; //get it from onmessage

var encoder = new GIFEncoder(); //create a new GIFEncoder for every new job
if(frame_index == 0){
  encoder.start();
}else{
  encoder.setProperties(true, true); //started, firstFrame
}
encoder.setSize(height, width);
encoder.addFrame(imageData, true);
if(frame_length == frame_index){
  encoder.finish()
}
postMessage(frame_index + encoder.stream().getData()) //on the page, search for the GIF89a to see the frame_index


var animation_parts = new Array(frame_length);
//on the handler side:

var worker = new WebWorker('blahblahblah.js');
worker.onmessage = function(e){
  //handle stuff, like get the frame_index
  animation_parts[frame_index] = frame_data;
  //check when everything else is done and then do animation_parts.join('') and have fun
}
var imdata = context.getImageData(0,0,canvas.width,canvas.height)
var len = canvas.width * canvas.height * 4;
var imarray = [];
for(var i = 0; i < len; i++){
  imarray.push(imdata[i]);
}

worker.postMessage(frame_index + ';' + frame_length + ';' + canvas.height + ';' + canvas.width + ';' + imarray.join(','))

ShinyTouch/JS 28 August 2009

Yay for yet another demo that strives to mix an mash almost everything HTML5 related! ShinyTouch in JS dumps the stuff from a <video> tag with ogg encoded video (well, almost all video from linux is ogg encoded so it’s just whatever format i got first from cheese). It gets dumped into <canvas> and getImageData does it’s magic.

Interestingly, if you don’t use the video and just do data from a raw image, you get upwards of 125fps on V8. Adding the video, it ceases to work on Chromium (maybe a linux thing? this tells me it’s just linux, but you can never be so sure).

//At this point, run away as the algorithm gets messy and hackish

So the thing just searches from right to left up to down within the quad. When it finds a column of something that fits the rgb range of the finger that is larger than a certain threshold, it checks for a reflection from the point. If it detects a reflection then yay! it throws the data at the perspective warper (based on a python one which is based on a C# one and though it would probably be easier to port from C# to JS making long chains of derivative work is fun). If there wasnt a reflection then it logs that and if that number is larger than some othe rthreshold then it kills the scanning and goes on with it’s life. The reflection algorithm just takes the point 5 pixels to the right and assumes that would be a reflection if there was one and a point 15px above and 5px to the left (nasty stuff) and takes the hue value from their RGB values. It takes the absolute value of the difference of the hue values multiplied by 100 (or 200 in the python version) and compares it with a preset configuration variable.

So now that that horrible algorithm which was just whatever came to my little totally untrained mind first. But it works semi-decently, at least for me. But you can hopefully see how nasty it’s inner workings are and it inspires people to clean it up. It’s quite a bit more readable than the Python version and only 200 lines of JS so it won’t be too hard to understand.

But since HTML5 has no Video capture thing for webcams, and my webcam doesn’t work with flash so I can’t use that canvas<-flash webcam bridge i built, uh, almost 2 years ago. So now you just get to gaze at my finger moving for like 20 seconds!

http://antimatter15.com/misc/shiny/shinytouch.html