somewhere to talk about random ideas and projects like everyone else

stuff

#elitist

XPath Bookmark Bookmarklet 01 November 2009

javascript:(function(){
  //inspired by http://userscripts.org/scripts/show/8924
  var s = document.createElement('script');
  s.setAttribute('src','http://ajax.googleapis.com/ajax/libs/jquery/1/jquery.js');
  if(typeof jQuery=='undefined') document.getElementsByTagName('head')[0].appendChild(s);
  (function() {
    if(typeof jQuery=='undefined') setTimeout(arguments.callee, 100)
    else{
      jQuery("*").one("click",function(event){
        //http://snippets.dzone.com/posts/show/4349
        for(var path = '', elt = jQuery(this)[0]; elt && elt.nodeType==1; elt=elt.parentNode){
          var idx = jQuery(elt.parentNode).children(elt.tagName).index(elt)+1;
          idx>1 ? (idx='['+idx+']') : (idx='');
          path='/'+elt.tagName.toLowerCase()+idx+path;
        }
        window.location.hash = "#xpath:"+path
        event.stopImmediatePropagation()
      })
    }
  })();
})()

Sometimes you want to link to a certain part of a web page. That’s great and works well if its a nice site that clearly defines anchor tags to link to, but what if there isn’t?

Today I just remembered something and I thought that I saw something earlier with a xpath URL hash. I googled it and couldn’t find anything native to the browser (please correct me if I’m wrong) but found this script: http://userscripts.org/scripts/show/8924 which is basically what I was thinking about. But it was allegedly hard to make those URLs, so I thought why not make a bookmarklet to make linking to those URLs simple? So I quickly hacked this together

javascript:(function(){var a=document.createElement("script");a.setAttribute("src","http://ajax.googleapis.com/ajax/libs/jquery/1/jquery.js");if(typeof jQuery=="undefined"){document.getElementsByTagName("head")[0].appendChild(a)}(function(){if(typeof jQuery=="undefined"){setTimeout(arguments.callee,100)}else{jQuery("*").one("click",function(d){jQuery(this)[0].scrollIntoView();for(var e="",c=jQuery(this)[0];c&&c.nodeType==1;c=c.parentNode){var b=jQuery(c.parentNode).children(c.tagName).index(c)+1;b>1?(b="["+b+"]"):(b="");e="/"+c.tagName.toLowerCase()+b+e}window.location.hash="#xpath:"+e;d.preventDefault();d.stopPropagation();jQuery("*").unbind("click",arguments.callee)})}})()})();

(Just drag it over to your bookmarks bar as with any other bookmarklet). To use, just click on the bookmark, and click on the element you want to link to. You should see the URL will update with a xpath hash showing you the copy-pastable link to that element. The code is quite simple and should work on Firefox, Chrome and all the other browsers (maybe even IE) but the ability to auto-scroll and actually use the links is only available to Firefox and potentially Opera and Chrome.

And I’m working on a Chrome Extension for the original userscript (which should work with Chrome’s userscript support, but I’m going to try packaging it as a chrome extension file) But sadly chromium for linux isnt up to speed especially with extension development.

The source can be found http://gist.github.com/223708.

Update: _Fixed the link for the path and added some stuff. Update 2_: Fixed bookmarklet, now scrolls to clicked, executes only once, prevents default

ShinyTouch/JS 28 August 2009

Yay for yet another demo that strives to mix an mash almost everything HTML5 related! ShinyTouch in JS dumps the stuff from a <video> tag with ogg encoded video (well, almost all video from linux is ogg encoded so it’s just whatever format i got first from cheese). It gets dumped into <canvas> and getImageData does it’s magic.

Interestingly, if you don’t use the video and just do data from a raw image, you get upwards of 125fps on V8. Adding the video, it ceases to work on Chromium (maybe a linux thing? this tells me it’s just linux, but you can never be so sure).

//At this point, run away as the algorithm gets messy and hackish

So the thing just searches from right to left up to down within the quad. When it finds a column of something that fits the rgb range of the finger that is larger than a certain threshold, it checks for a reflection from the point. If it detects a reflection then yay! it throws the data at the perspective warper (based on a python one which is based on a C# one and though it would probably be easier to port from C# to JS making long chains of derivative work is fun). If there wasnt a reflection then it logs that and if that number is larger than some othe rthreshold then it kills the scanning and goes on with it’s life. The reflection algorithm just takes the point 5 pixels to the right and assumes that would be a reflection if there was one and a point 15px above and 5px to the left (nasty stuff) and takes the hue value from their RGB values. It takes the absolute value of the difference of the hue values multiplied by 100 (or 200 in the python version) and compares it with a preset configuration variable.

So now that that horrible algorithm which was just whatever came to my little totally untrained mind first. But it works semi-decently, at least for me. But you can hopefully see how nasty it’s inner workings are and it inspires people to clean it up. It’s quite a bit more readable than the Python version and only 200 lines of JS so it won’t be too hard to understand.

But since HTML5 has no Video capture thing for webcams, and my webcam doesn’t work with flash so I can’t use that canvas<-flash webcam bridge i built, uh, almost 2 years ago. So now you just get to gaze at my finger moving for like 20 seconds!

http://antimatter15.com/misc/shiny/shinytouch.html


Shinytouch Perspective Transform 23 August 2009

Shinytouch perspective transforms now work!

One big issue with ShinyTouch is that it didn’t transform points correctly, but now it has been totally resolved by stealing this (MIT licensed) from the linux (python!) port of Wiimote Whiteboard (Johnny lee’s famous work). Now it works totally insanely awesomely, no elitists necessary.


I GOT A GOOGLE WAVE INVITE! 13 August 2009

IM STILL WAITING TO GET MY ACCOUNT BUT I JUST GOT AN INVITE AND IM SOOO HAPPY!!!!!!!!!!! SEE? LOOK I’M USING CAPS LOCK TO EXPRESS MY HAPPYNESS! IT’S REALLY REALLY REALLY AWESOME EVEN THOUGH I HAVENT ACTUALLY TRIED IT OUT YET! BUT ITS SOOOO COOL! AND LETS BE HONEST, AT LEAST THIS POST ISNT IN COMIC SANS MS.

EDIT: i got my wave account. It’s cool, but there’s nobody to talk to.


TUIO Support 01 August 2009

So even though the algorithms that transform the calibration box aren’t working accurately yet, TUIO support has been made, so you can use apps like TUIO Mouse to control your computer and other touch demo things.


ShinyTouch Images 01 August 2009

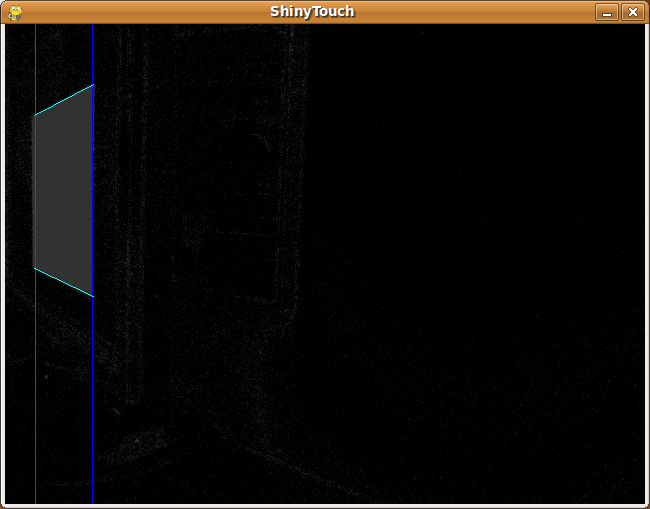
This is the app running, notice that it’s not yet been calibrated yet.

Here is the auto-calibration process, it alternates between black and white

This is part of Auto-Calibration.

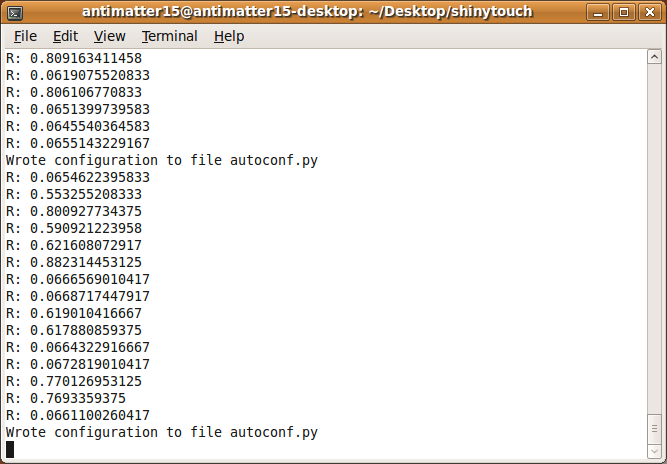
This is some stuff from the command line:

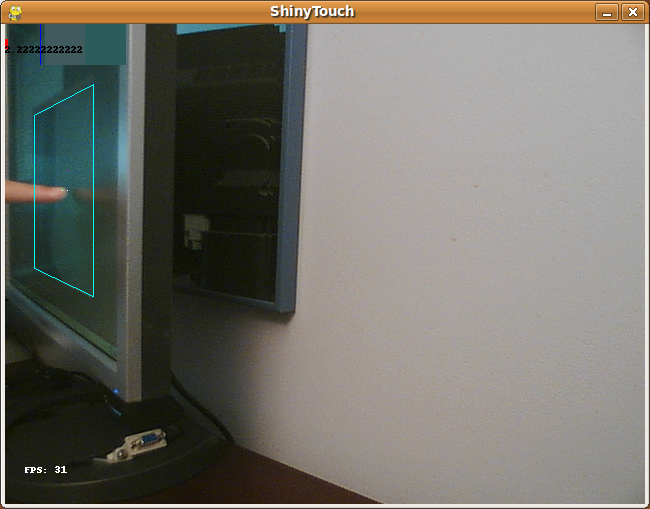
This is just hovering over the screen, notice it’s not touching, and the algorithm can distinctly recognize the lack of a touch because the reflection is seperated from the finger by a significant gap. (Compare the top red bar).

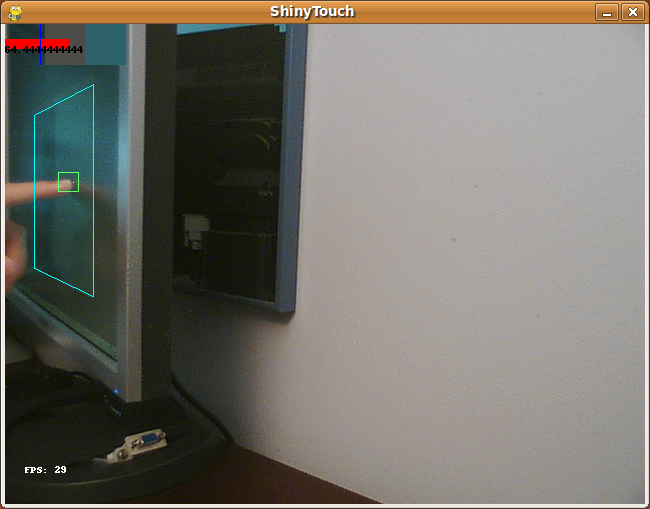
This is a actual touch, you can see that the red bar is far larger, and it’s very distinctly a touch event.

There’s a draw tool and, here is a primitive drawing of a smiley. The dots come from an issue with PIL/OpenCV or something that makes the image all chopped up and sends the point to an arbitary point on the screen.

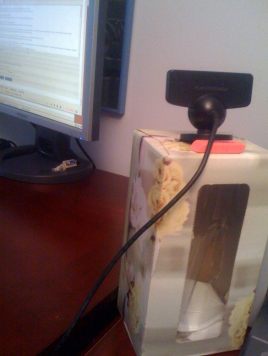
This is the magical sensor the whole thing is powered by: An unmodified Playstation 3 Eye on a tissue box with a pink Office Depot eraser on the back (because the camera is made tilted and the script can’t handle those tilts very well)

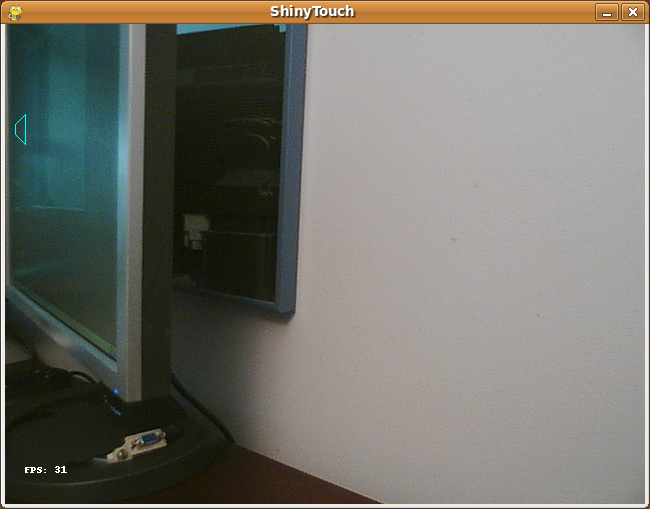
It’s not too insanely slow either. This is 31 frames per second coming from a pure python app, all from a scripting language. It is nowhere as fast as the normal fast native apps.


New ShinyTouch Algorithms 21 July 2009

The algorithms are nearing completion. They now function most of the time and are fairly situation-agnostic and mostly zero-config.

A cool new thing it does now is using the HSV color space rather than the RGB one and comparing the hue values. It turns out that this creates the most noticable difference between colors and it can easily tell different colors and shapes apart.

There is also a new shape-detection system, because all previous ones checked colors. This works by getting a sample of the finger color and the background color and comparing the closeness of surrounding pixels to each one. It ends when it finds a pixel closer to the bg than the finger. This one is truly zero config.

Another one checks the similarities in hue of the alleged reflection color and the known bg color. If it’s not similar enough, then it is recognized as a touch. It does use some configuration, but it shouldn’t vary much from situation-to-situation to require serious configuration.

There is also a new failure, which is generating a supposed ideal sum ratio to detect things (which is how the newly old one worked backwards). Though it spawned a new version that uses HSV instead, and it works pretty well.

Also, almost all the functions now create bar-graph visualizations. Very futuristic and augmented-reality style.


ShinyTouch Progress Update + Fresnel's Equations 12 July 2009

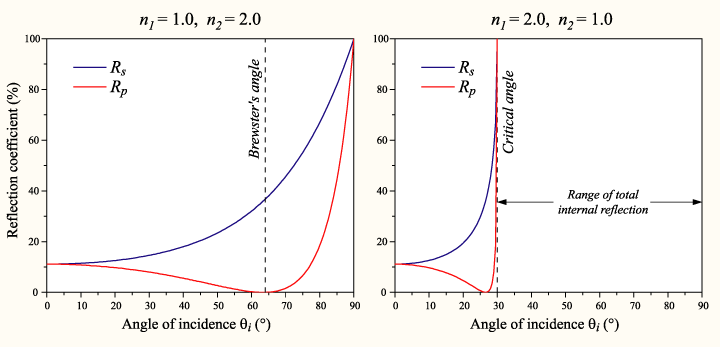
So I was looking through wikipedia to find out if there were some magical equations to govern how it should mix the color of the background screen contents and the reflection and make the application work better. I think Fresnel’s equations fit that description. It basically gives the reflectiveness of the substance from information about the substance, the surrounding substance (air) and the angle of incidence.

Well  this image really is quite intimidating. I wont even pretend to understand it  but it looks like Fresnels equations with different values of n1 and n2 (some ratio for different temperatures). And is the plot on the right the same Total Internal Reflection in FTIR?
A really intimidating image from none other than Wikipedia

It’s quite interesting, partly because the shinyness (and thus the ratios used to combine the background color with the finger to compare) depends on the angle of the webcam to the finger, which depends on the distance (yay for trigonometry?). So the value used isn’t the 50-50 ration that it currently uses in the algorithm universally, but it’s dependent on variables to Fresnel’s Equations and the distance of the finger.

I forgot what this was supposed to describe

Anyway, time for a graphic that doesn’t really explain anything because I lost my train of thought while trying to understand how to use Inkscape!

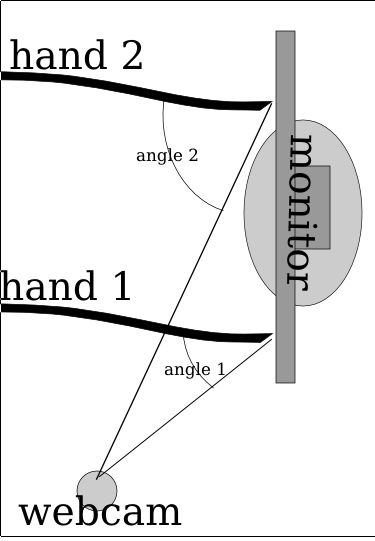
So here’s something more descriptive. The two hands (at least it’s not 3, and why they’re just lines with no fingers isn’t my fault) and they’re positioned at different locations, one (hand 1) is close to the camera while the second (hand 2) is quite far away. Because of magic and trigonometry, the angle of the hand is greater when it’s further away. Also, this plugs into Fresnel’s Equations which mean the surface is shinier for where hand 2 is touching while it’s less shiny for hand 1. So the algorithm has to adjust for the variation (and if this works, then it might not need the complex region specific range values).

Notice how Angle 2 for hand 2 is much larger than angle 1 because of how it
Yay For Trig!

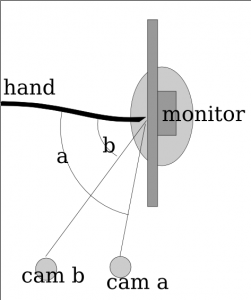
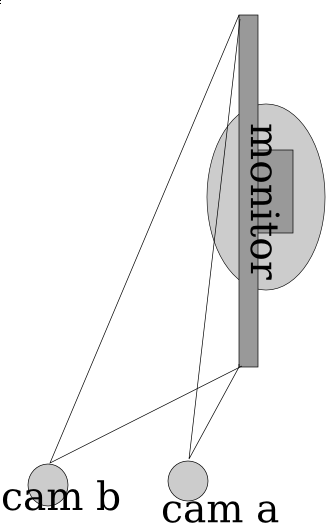
So here it’s pretty ideal to have the angle be pretty extreme right? Those graphs sure seem imply that extreme angles are a good thing. But no, because quite interestingly, the more extreme the angle is, then the less accurate the measures from the x axis become. So in the image below, you can see that cam b is farther from the monitor (and thus has a greater angle from the monitor) and it can discern far more accurately depth than than cam a. The field of view for cam a is squished down to that very thin angle whereas the cam b viewing area is far larger. Imagine if there was a cam c which was mounted directly in front of the monitor, it would suffer from no compression of the x axis like a _or _b but instead it has full possible depth.

the more extreme the angle is  then the lower the resolution of the usable x axis becomes. So while you get better accuracy (shinier = easier to detect) the accuracy point you can reduce it to declines proportionally.
Extreme angles have lower precision

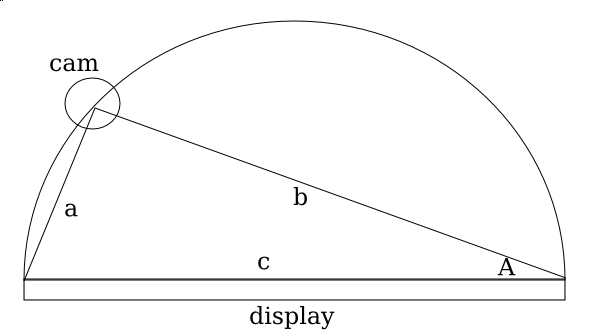
So for the math portion, interestingly, the plot for the decline in % of the total possible width is equivalent to the 1-sin() (I think, but if I’m wrong then it could be cos() and i suck at math anyway).

So since it
More Trig!

So if you graph out 1-sin(n) then you get a curve where it starts at 100% when the angle the camera is positioned at is 0 degrees from an imaginary line perpendicular to the center of the surface, and it approaches 0% as the degree measure reaches 90 deg.

So interestingly when you plot it, basically what happens is a trade-off between the angle the camera is at and the precision (% of ideal maximum horizontal resolution) and accuracy (shinyness of reflection). I had the same theory a few days ago, even before I discovered Fresnel’s Equations, though mine was more linear. I thought that it was just a point in which the values dropped for the shinyness. I thought that the reason the monitor was shinier from the side is that it was beyond the intended viewing angle, so since there is less light at the direction, the innate shinyness is more potent.

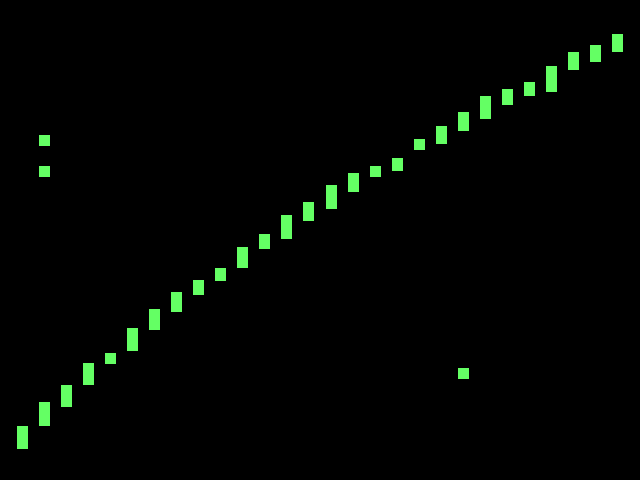
So what does this mean for the project? Well, it confirms my initial thoughts that this is far too complicated for me to do alone, and makes me quite sad (partly because of the post titled Fail that was published in january). It’s really far too complicated for me. Right now the algorithm I use is very approximate (and noticably so). The formula improperly adjusts for perception and so if you try to draw a straight line across the monitor, you end up with a curved section of a sinusoidal-wave.

Trying to draw a straight line across the screen ends up looking curved because it uses a linear approximate distortion adjustment algorithm. Note that the spaces between the bars is because of the limited horizontal resolution  partly due to the angle  mostly due to hacks for how slow python is.
Issues with algorithm

So it’s far more complicated than I could have imagined at first, and I imagined it as far too complicated for me to venture in this alone. But I’m trying even with this sub-ideal situation. So the rest of the algorithm for now will also remain with more linear approximations. I’m going to experiment in making more linear approximations of the plot of Fresnel’s equations. And hopefully it’ll work this time.


I Fail 26 January 2009

I Fail